How To Install Wordpress With Apache And PHP-FPM On Centos 7
Below is step by step how to install wordpress with apache and php-fpm on centos 7.
1. Open command line app such as windows cmd app, linux terminal app, mac terminal app and so on.
2. Login into your vps server hosting via command line app.
To do so, type following command lines and hit enter.
ssh vps-login-username@vps-ip-addressYou will be asked for vps login username password. If so, type the password and hit enter.
3. Install apache.
To do so, type following command lines and hit enter.
sudo yum install httpd4. Start apache server.
To do so, type following command lines and hit enter.
sudo systemctl start httpd5. Restart apache server.
To do so, type following command lines and hit enter.
sudo systemctl restart httpd6. Check status of the apache server.
To do so, type following command lines and hit enter.
sudo systemctl status httpd7. Install mariadb server.
To do so, type following command lines and hit enter.
sudo yum install mariadb-server8. Start mariadb server.
To do so, type following command lines and hit enter.
sudo systemctl start mariadb9. Restart mariadb server.
To do so, type following command lines and hit enter.
sudo systemctl restart mariadb10. Status of the mariadb server.
To do so, type following command lines and hit enter.
sudo systemctl status mariadb11. Secure mariadb server.
To do so, type following command lines and hit enter.
sudo mysql_secure_installationBelow is recommended mariadb database server installation's security options.
NOTE: RUNNING ALL PARTS OF THIS SCRIPT IS RECOMMENDED FOR ALL MariaDB
      SERVERS IN PRODUCTION USE!  PLEASE READ EACH STEP CAREFULLY!

In order to log into MariaDB to secure it, we'll need the current
password for the root user.  If you've just installed MariaDB, and
you haven't set the root password yet, the password will be blank,
so you should just press enter here.

Enter current password for root (enter for none):
OK, successfully used password, moving on...

Setting the root password ensures that nobody can log into the MariaDB
root user without the proper authorisation.

Set root password? [Y/n] y
New password:
Re-enter new password:
Password updated successfully!
Reloading privilege tables..
 ... Success!


By default, a MariaDB installation has an anonymous user, allowing anyone
to log into MariaDB without having to have a user account created for
them.  This is intended only for testing, and to make the installation
go a bit smoother.  You should remove them before moving into a
production environment.

Remove anonymous users? [Y/n] y
 ... Success!

Normally, root should only be allowed to connect from 'localhost'.  This
ensures that someone cannot guess at the root password from the network.

Disallow root login remotely? [Y/n] y
 ... Success!

By default, MariaDB comes with a database named 'test' that anyone can
access.  This is also intended only for testing, and should be removed
before moving into a production environment.

Remove test database and access to it? [Y/n] y
 - Dropping test database...
 ... Success!
 - Removing privileges on test database...
 ... Success!

Reloading the privilege tables will ensure that all changes made so far
will take effect immediately.

Reload privilege tables now? [Y/n] y
 ... Success!

Cleaning up...

All done!  If you've completed all of the above steps, your MariaDB
installation should now be secure.

Thanks for using MariaDB!
12. Install PHP-FPM Server.
To do so, type following command lines and hit enter, one by one.
yum -y install centos-release-scl.noarch
yum -y install rh-php72 rh-php72-php rh-php72-php-fpm rh-php72-php-mysqlnd
13. Start PHP-FPM.
To do so, type following command lines and hit enter, one by one.
sudo systemctl start rh-php72-php-fpm14. Restart PHP-FPM.
To do so, type following command lines and hit enter, one by one.
systemctl restart rh-php72-php-fpm15. Check status of the PHP-FPM.
To do so, type following command lines and hit enter, one by one.
systemctl status rh-php72-php-fpmYou have to make additional httpd setup, so that php files can be processed by php-fpm server. To do so, follow these steps.
16. Create fpm.conf file.
sudo /etc/httpd/conf.d/fpm.confAnd fill it with these lines.
ProxyPassMatch ^/(.*.php)$ fcgi://127.0.0.1:9000/var/www/html

Alias / /var/www/html/
17. Restart apache.
To do so, type following command lines and hit enter, one by one.
sudo systemctl restart httpd18. Create a file named info.php
To do so, type following command lines and hit enter.
sudo nano /var/www/html/info.phpCopy the following php script below into the info.php file.
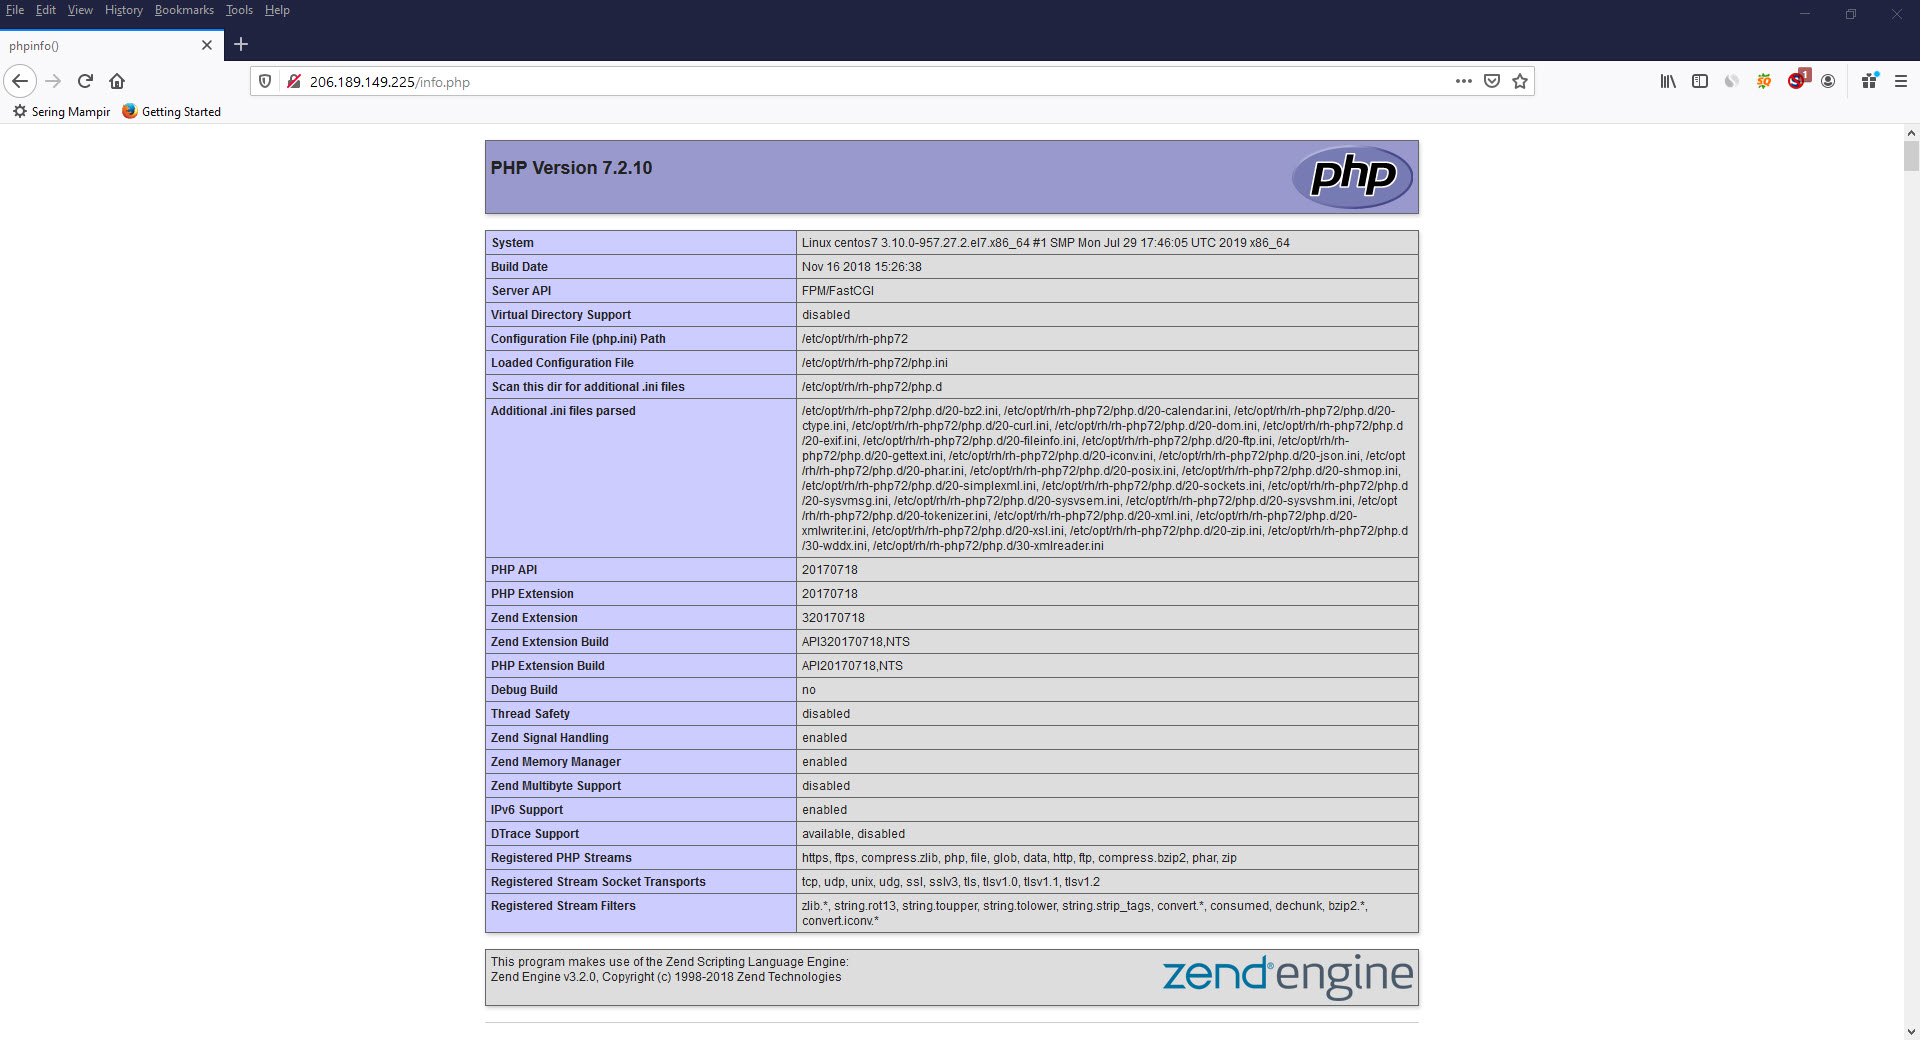
<?php phpinfo() ?>19. Type the following into your beloved browser's address bar, then hit enter.
http://ip_address/info.php.
20. Create a file named wp.conf.
To do so, type following command lines and hit enter.
sudo nano /etc/httpd/conf.d/wp.confCopy the following lines below into the wp.conf file.
<VirtualHost *:80>
 ServerName wordpress
 ServerAlias *.wordpress
 DocumentRoot "/var/www/html/wordpress"
 <Directory "/var/www/html/wordpress">
  Require all granted
  DirectoryIndex index.php
  AllowOverride FileInfo
  FallbackResource /index.php
 </Directory>
 <Directory "/var/www/html/wordpress/wp-admin">
  FallbackResource disabled
 </Directory>
 ProxyPassMatch ^/(.*\.php(/.*)?)$ fcgi://127.0.0.1:9000/var/www/html/wordpress/$1
</VirtualHost>
21. Restart apache.
To do so, type following command lines and hit enter.
sudo systemctl restart httpd22. Create a database name.
To do so, type following command lines and hit enter.
create database wpdatabase;23. Create a database username.
To do so, type following command lines and hit enter.
CREATE USER 'wpuser'@'localhost' IDENTIFIED BY 'Cwo48*&#';24. Grant all privileges of the database username on database name.
To do so, type following command lines and hit enter.
GRANT ALL PRIVILEGES ON wpdatabase.* TO 'wpuser'@'localhost';25. Download wordpress.
To do so, type following command lines and hit enter, one by one.
cd /var/www/html
wget http://wordpress.org/latest.tar.gz
26. Extract latest.tar.gz.
To do so, type following command lines and hit enter.
tar xzvf latest.tar.gz27. Type the following into your beloved browser's address bar, then hit enter.
http://ip_address
The following page will be displayed on your computer screen.
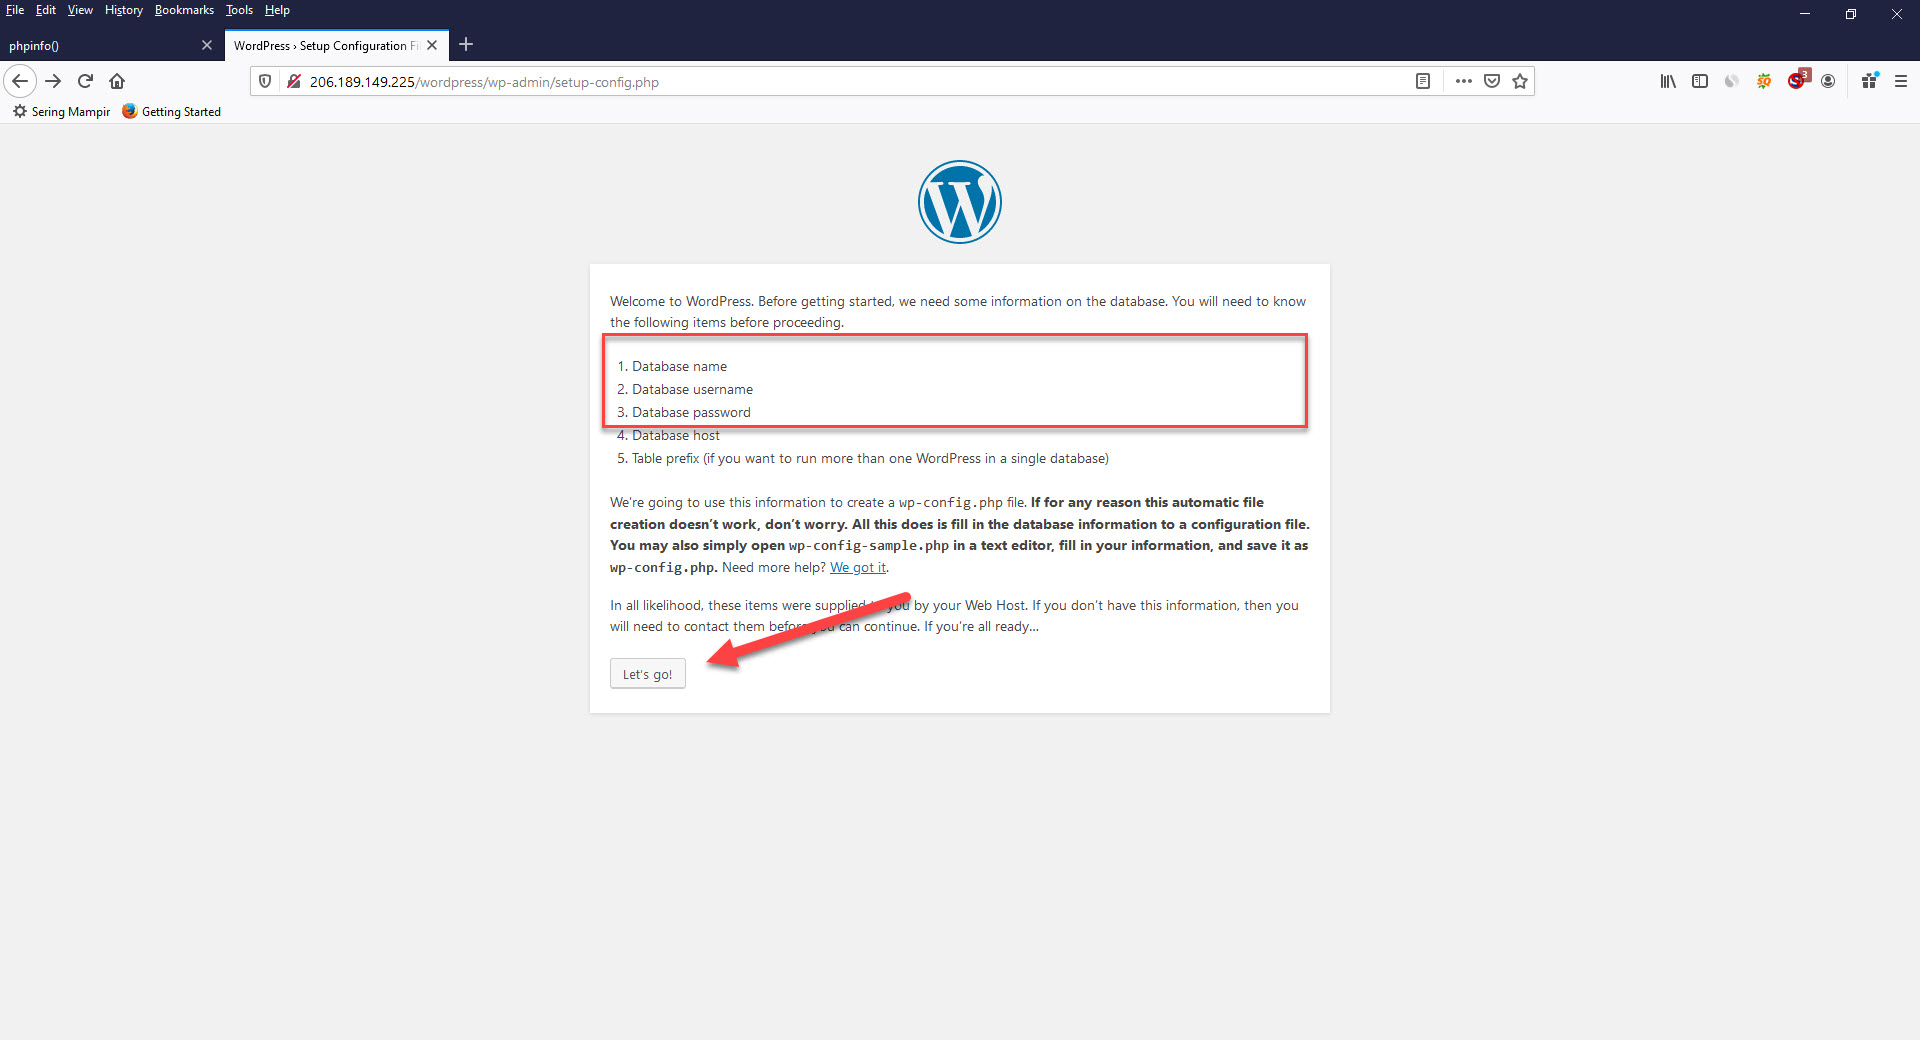
Hit "Let's Go" button.
28. Enter the database you have just created into the following page. Then hit "submit" button.
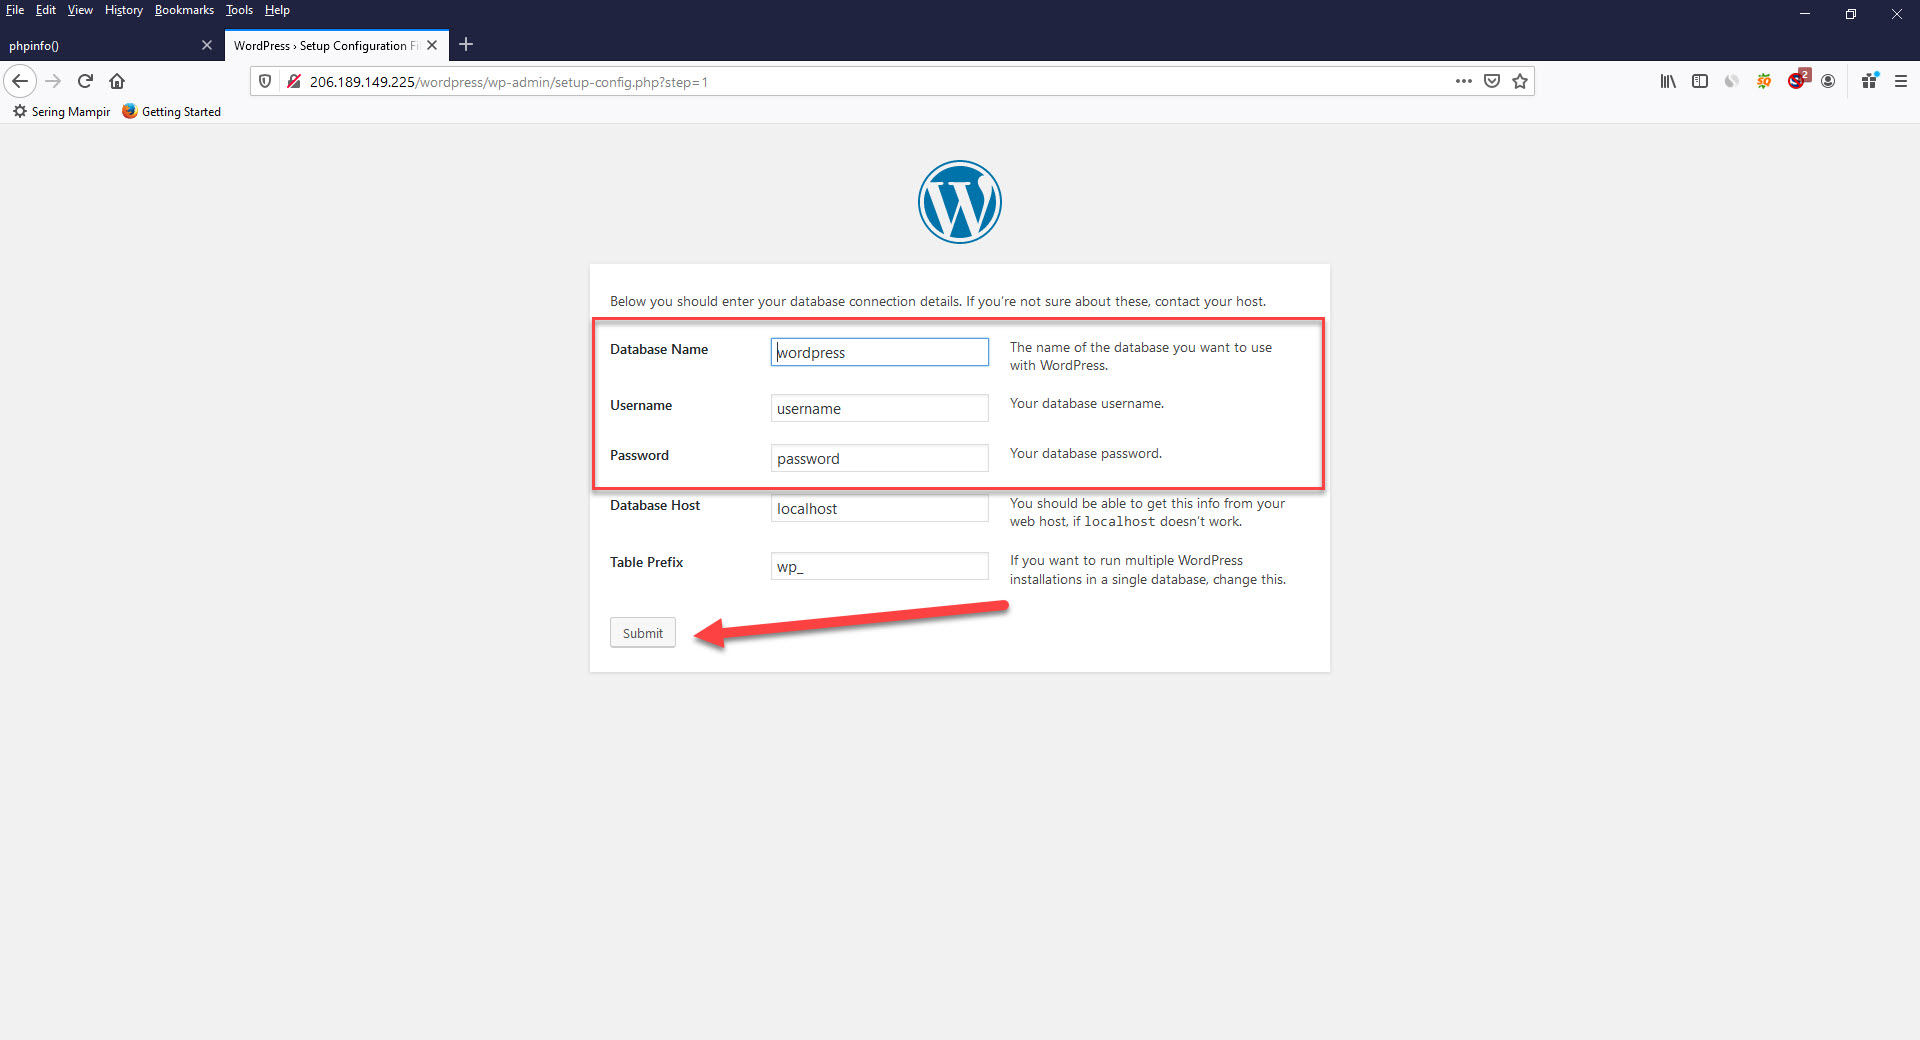
29. In this step, you will be asked to create wp-config.php. Copy the text you find in this step and paste it into the wp-config.php you have just created. And click "run the installation".
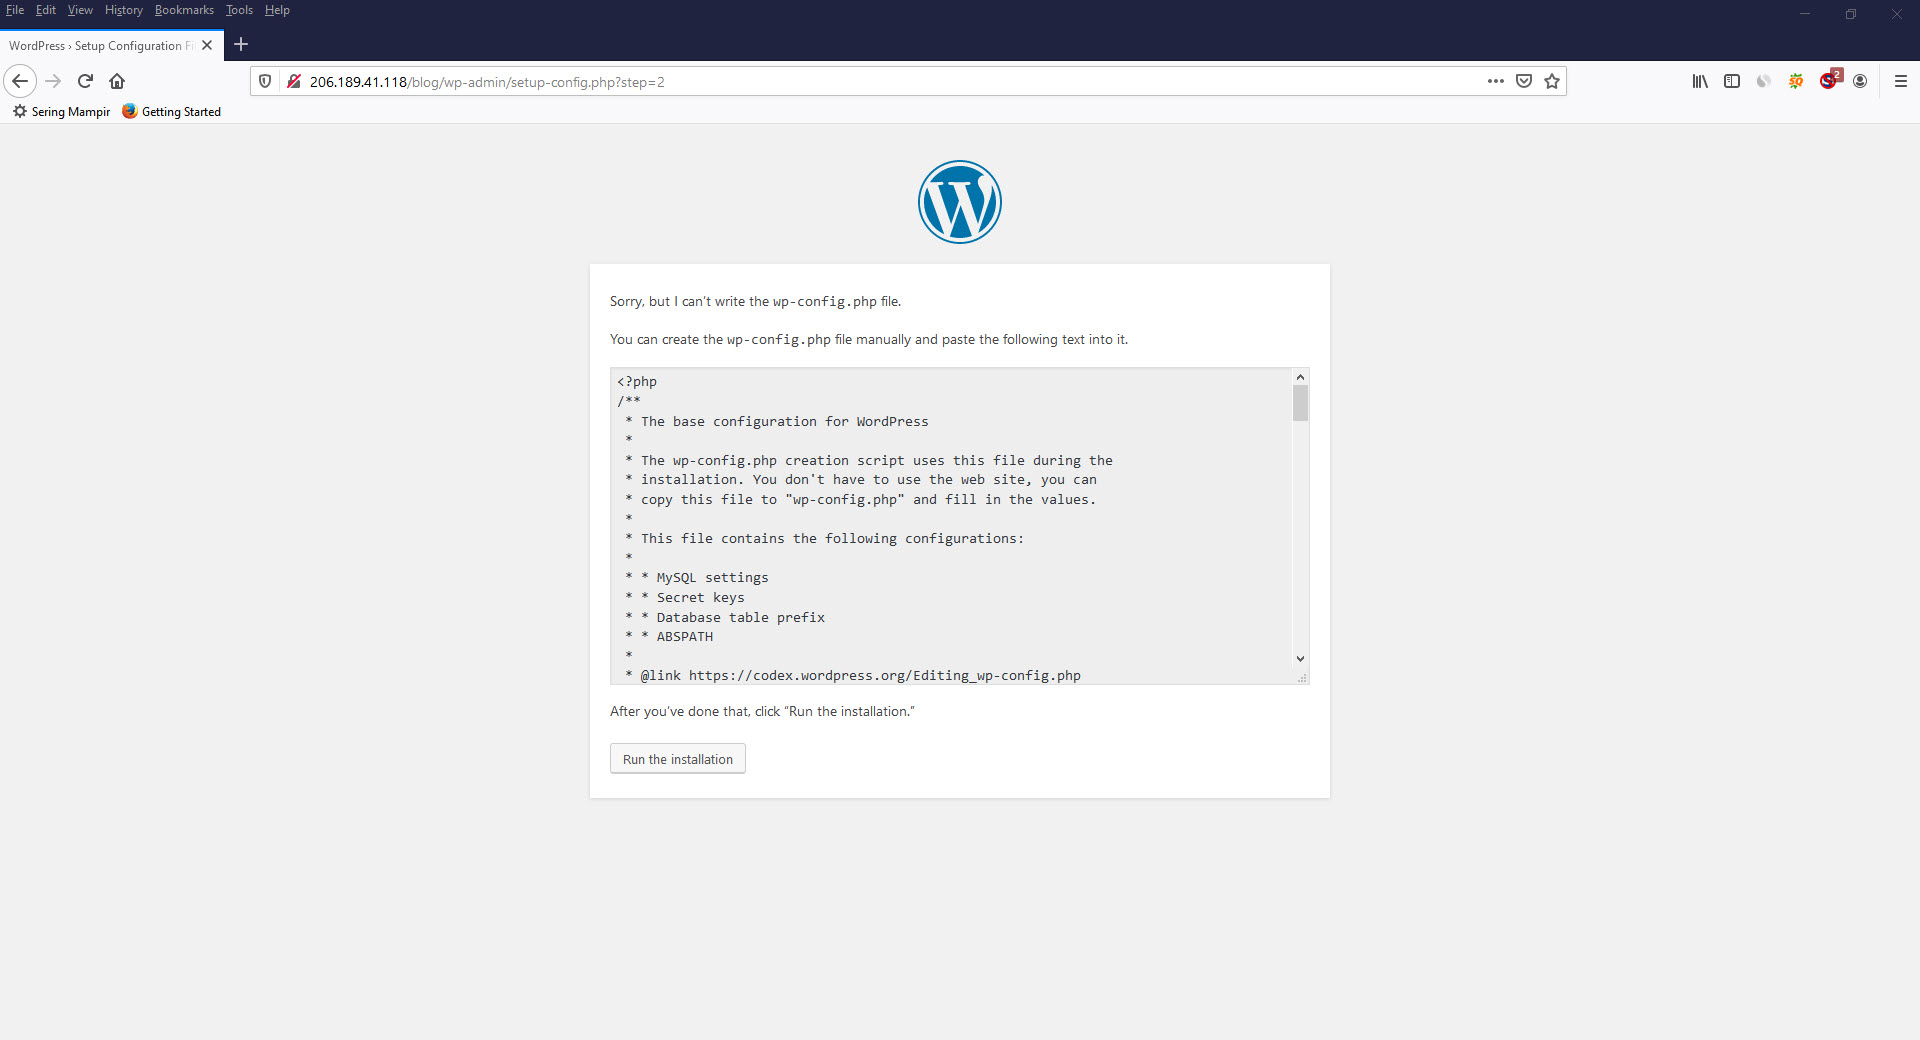
Below the example of wp-config.php.
<?php
/**
 * The base configuration for WordPress
 *
 * The wp-config.php creation script uses this file during the
 * installation. You don't have to use the web site, you can
 * copy this file to "wp-config.php" and fill in the values.
 *
 * This file contains the following configurations:
 *
 * * MySQL settings
 * * Secret keys
 * * Database table prefix
 * * ABSPATH
 *
 * @link https://codex.wordpress.org/Editing_wp-config.php
 *
 * @package WordPress
 */

// ** MySQL settings - You can get this info from your web host ** //
/** The name of the database for WordPress */
define( 'DB_NAME', 'wpdatabase' );

/** MySQL database username */
define( 'DB_USER', 'wpuser' );

/** MySQL database password */
define( 'DB_PASSWORD', 'Cwo48*&#' );

/** MySQL hostname */
define( 'DB_HOST', 'localhost' );

/** Database Charset to use in creating database tables. */
define( 'DB_CHARSET', 'utf8' );

/** The Database Collate type. Don't change this if in doubt. */
define( 'DB_COLLATE', '' );

/**#@+
 * Authentication Unique Keys and Salts.
 *
 * Change these to different unique phrases!
 * You can generate these using the {@link https://api.wordpress.org/secret-key/1.1/salt/ WordPress.org secret-key service}
 * You can change these at any point in time to invalidate all existing cookies. This will force all users to have to log in again.
 *
 * @since 2.6.0
 */

define('AUTH_KEY',         'b&pCKl@v)?,Pw[BY#uaU^?rJI8p9u5/>`nU/:C9AWIRA27KwRG?!#-}`t6Y`Y+nn');
define('SECURE_AUTH_KEY',  '[a6tJ(2`sxm![v2HdW!k72+ZV~^Wu:TP8R-[4{~H|]HWJTE%6&:GC7n3U)yITPsF');
define('LOGGED_IN_KEY',    'xn@V/-c3>0i%z}wV5`R-|GL/e>C4dMYlIWH>-oKmc=P [#QFOv}O-^%@ajz0-h<`');
define('NONCE_KEY',        'MxFMeyczY:zi7r98k(wg_,5J^o+yumK smFrPIlQ~2fZeEbjg+t*1IfDXD(%gh$-');
define('AUTH_SALT',        '||zuN%h-*wgEBk<V|aVA_K8fkR@31t8M<9Sq&O X5<vZw4FnvU^u@!-|H`L`1!Wh');
define('SECURE_AUTH_SALT', 'e-C)g5=e5!)Q_B@71^v<r%+ * 1r-[u&XrMf`T@x!`(.%te|GM-MH[FH>Os>n-z~');
define('LOGGED_IN_SALT',   '?W9YVziA8]mMSt,7&16hbbg QDN:7Ip TM/J[Kzeu4/;eA$L{LT9}@#^_X:Je!WV');
define('NONCE_SALT',       '[PWqef,WJ3*i 1:1[Mup9%`1?^XUIjaO2D!|+c!HAhZ{.DbObb$b4}+BWl|*s@}T');

/**#@-*/

/**
 * WordPress Database Table prefix.
 *
 * You can have multiple installations in one database if you give each
 * a unique prefix. Only numbers, letters, and underscores please!
 */
$table_prefix = 'wp_';

/**
 * For developers: WordPress debugging mode.
 *
 * Change this to true to enable the display of notices during development.
 * It is strongly recommended that plugin and theme developers use WP_DEBUG
 * in their development environments.
 *
 * For information on other constants that can be used for debugging,
 * visit the Codex.
 *
 * @link https://codex.wordpress.org/Debugging_in_WordPress
 */
define( 'WP_DEBUG', false );

/* That's all, stop editing! Happy publishing. */

/** Absolute path to the WordPress directory. */
if ( ! defined( 'ABSPATH' ) ) {
    define( 'ABSPATH', dirname( __FILE__ ) . '/' );
}

/** Sets up WordPress vars and included files. */
require_once( ABSPATH . 'wp-settings.php' );
30. Fill the "Site title, Username, Password and Your Email" with the "Site title, Username, Password and Your Email" you like. Do not check the Search Engline Visibility. Fill out the information and click "Install Wordpress."
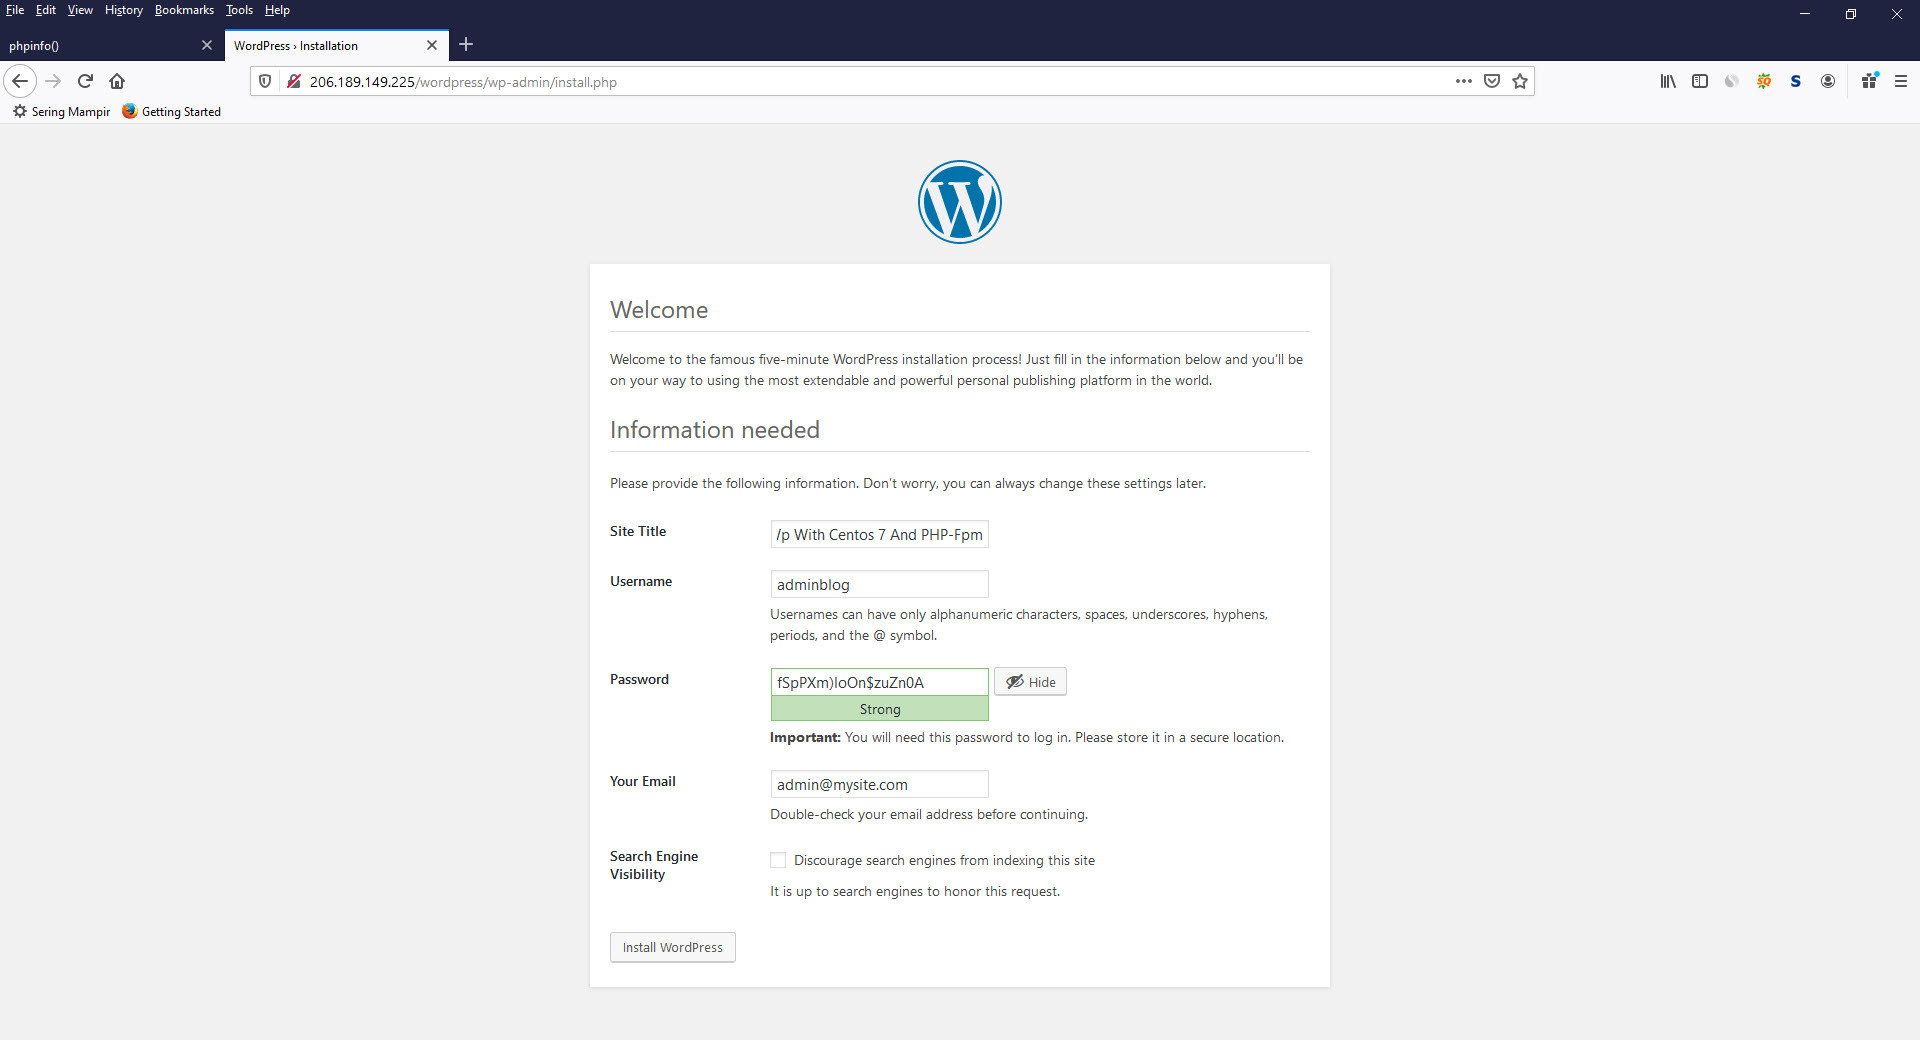
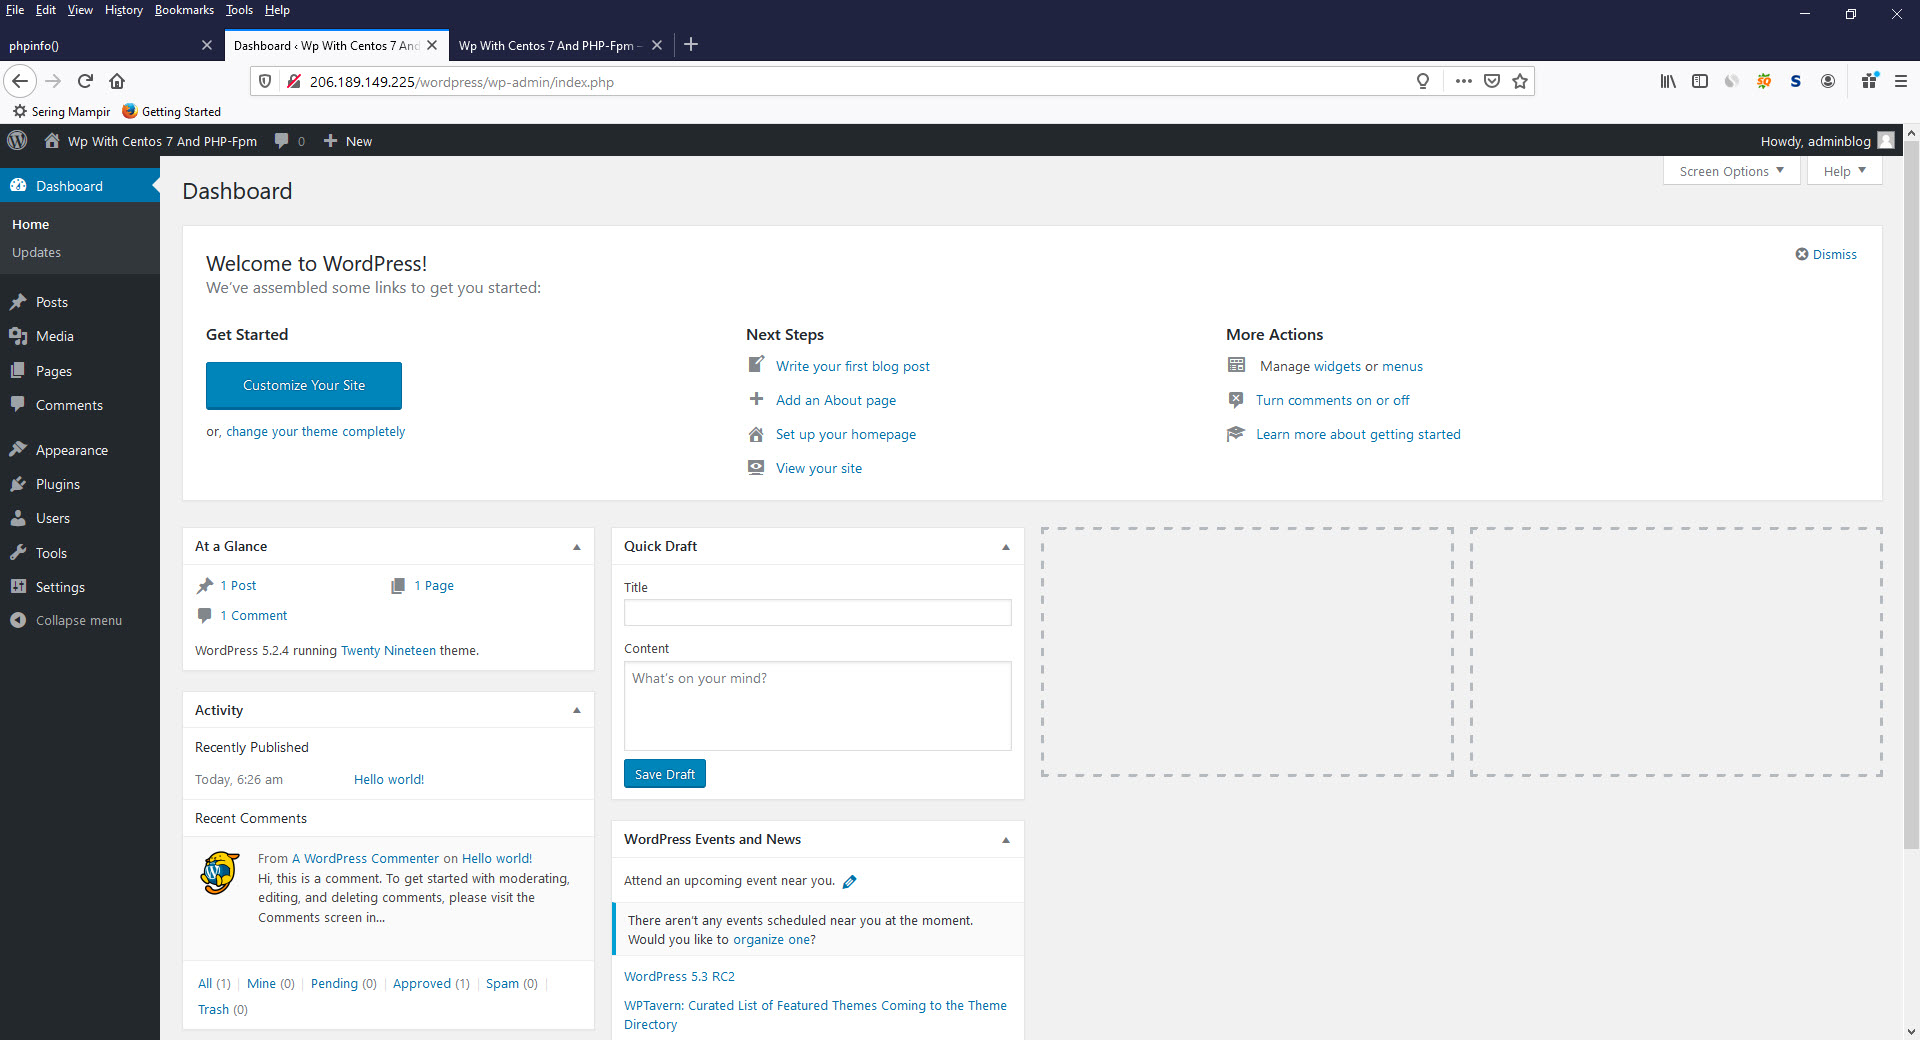
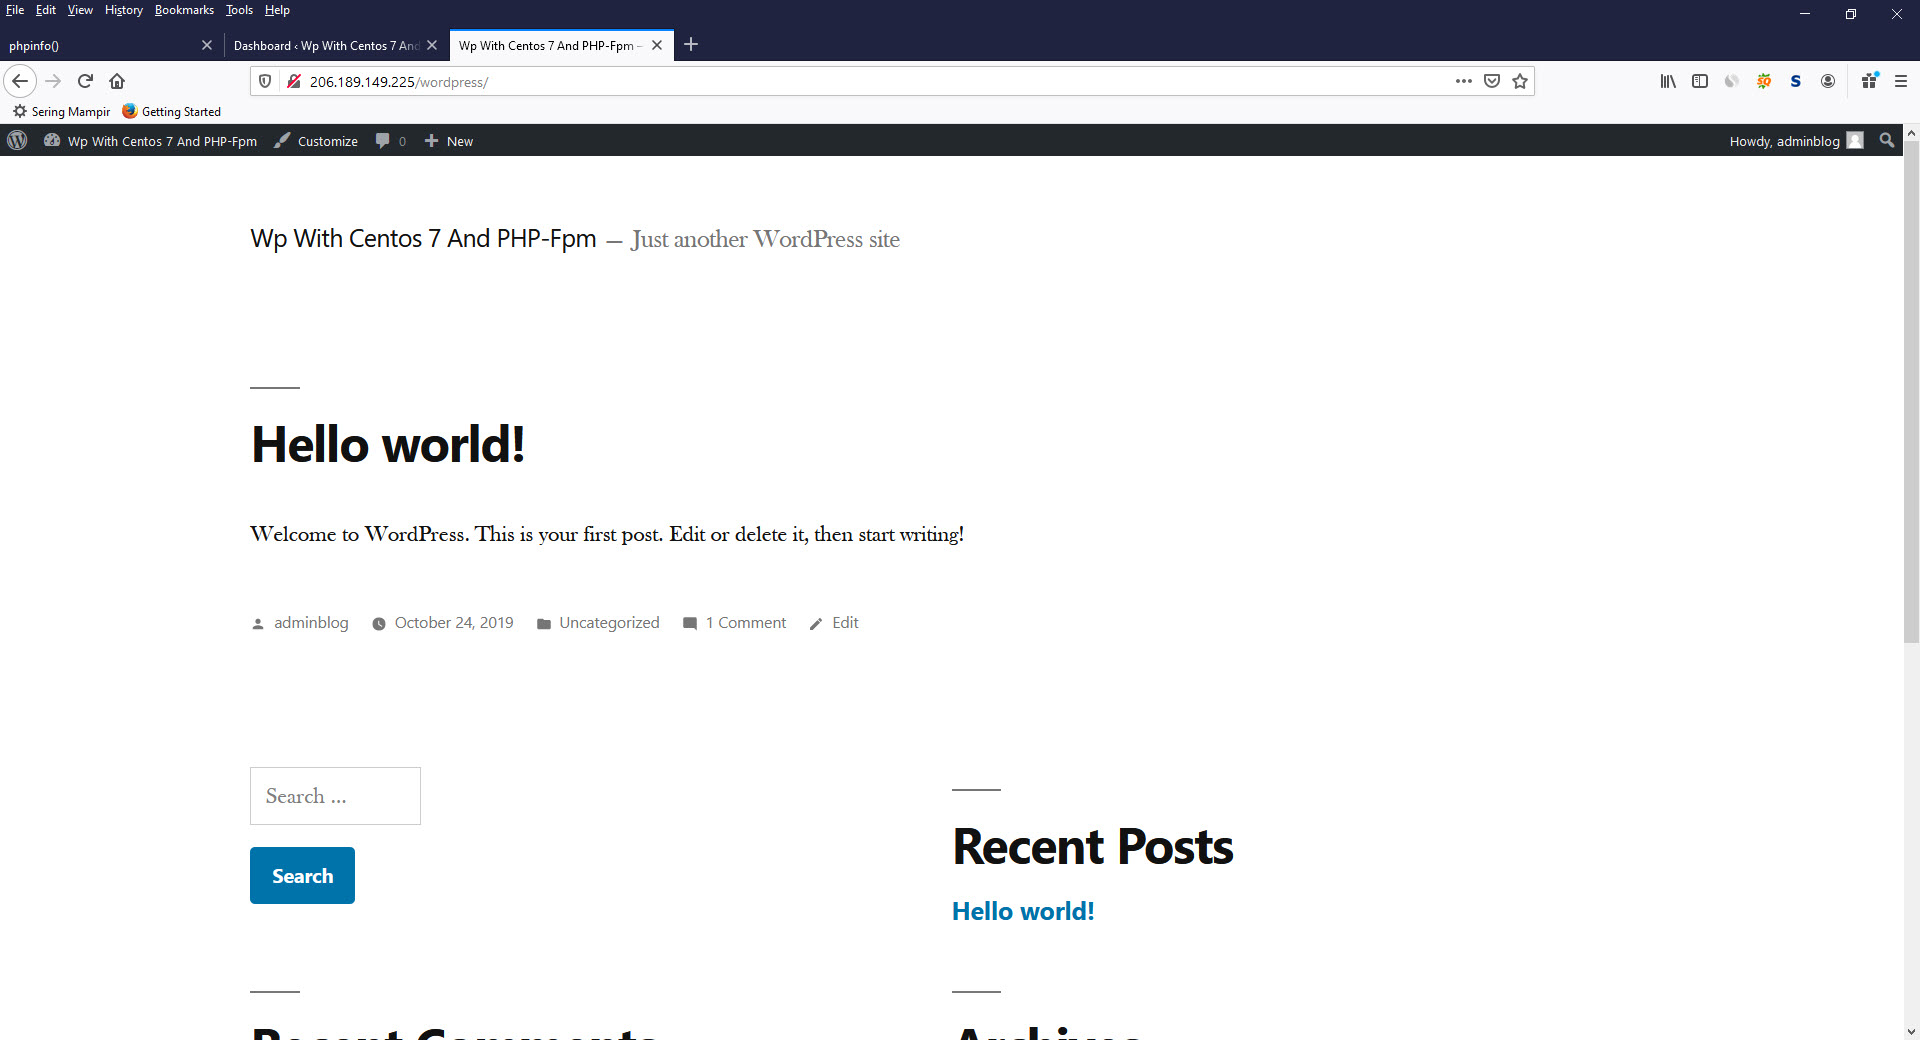
31. If the installation process is complete, you can login to wordpress admin with the username and password you have provided.
Tags :
